Support
Wireless Support: Set DNS Settings to Automatic
CSU wireless networks require IP address and DNS settings to be automatically downloaded. When connected to other networks, these settings may have been manually configured, or have been adjusted by third party software such as antivirus.
Desktop
-
Windows
- In Windows 10, in the search box on the taskbar, type View network connections, and then select View network connections at the top of the search results list.
- In Windows 8.1, select the Start button, start typing View network connections, and then select View network connections in the list.
-
In Windows 7, open Network Connections by selecting the Start button, and then selecting Control Panel. go to Network and Sharing Center, select Change Adapter Settings
-
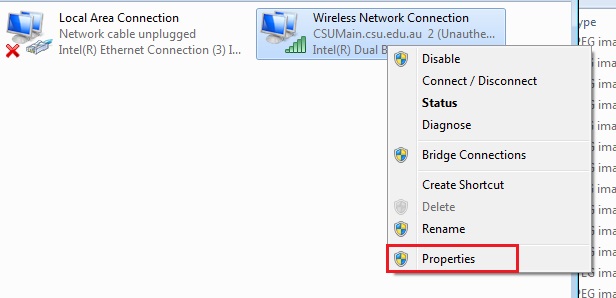
Right-click your Wireless connection, and then select Properties.
If you're prompted for an administrator password or confirmation, type the password or provide confirmation.
-
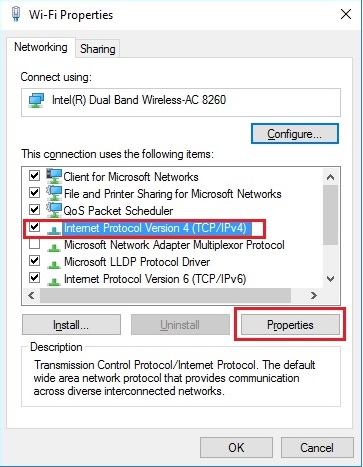
Select the Networking tab. Under This connection uses the following items, select Internet Protocol Version 4 (TCP/IPv4) and then select Properties.
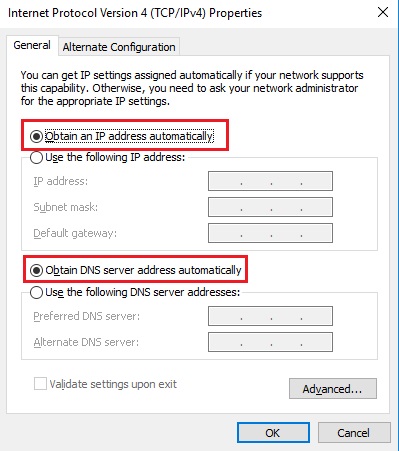
- Confirm you have selected Obtain an IP address automatically, and then select OK.
-
Confirm you have selected DNS server address automatically using DHCP, and then select OK
- Retry your connection
-
Right-click your Wireless connection, and then select Properties.
-
Mac OS
-
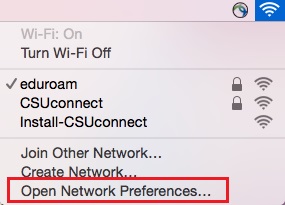
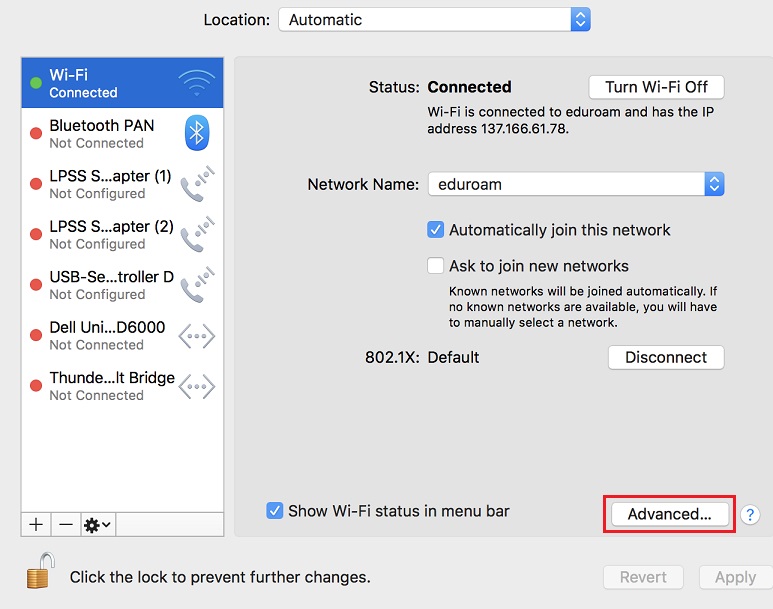
Select the WiFi symbol along the top menu bar and click on Open Network Preferences at the bottom of the drop down menu
-
Click on WiFi in the menu on the left and click Advanced located at the bottom right of the pop-up window
-
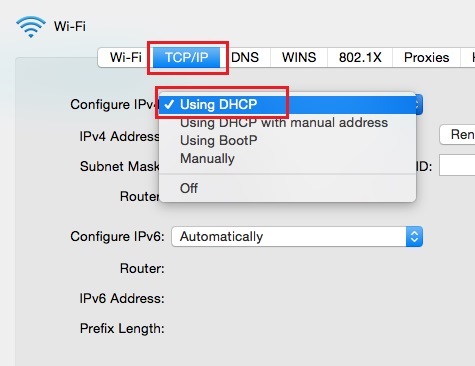
Click on the TCP/IP Tab
-
Set the Configure IPv4 drop down to Using DHCP.
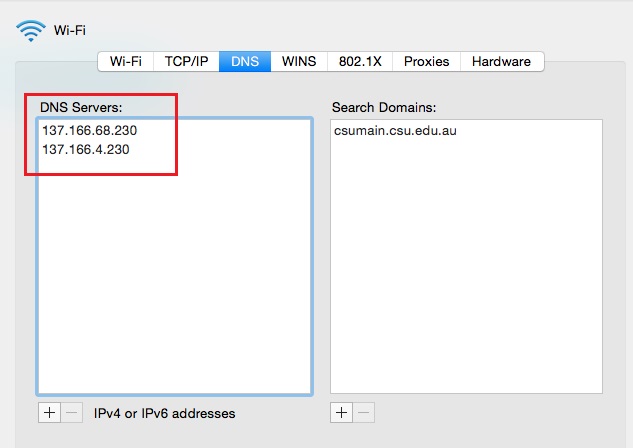
- Select the DNS tab at the top of the window.
-
Make sure your DNS servers and Search domain mirror the configurations shown in the following image.
-
If you have different DNS servers then pictured, click on the ip address in the pane and then click the minus symbol to remove

- When all custom set DNS servers are removed, CSU DNS server ip's will automatically fill as shown in Step 6
- Click OK and then Apply in the Advanced Networking and Networking windows
-
Select the WiFi symbol along the top menu bar and click on Open Network Preferences at the bottom of the drop down menu